Want to learn WordPress without having to buy a domain name and hosting? Looking to experiment or develop your website locally before going live?
Why not install WordPress locally on your computer?
We used local installations to safely develop templates, test plugins and experiment with CSS that could break a live website, for years.
If you Windows and want to do the same this post is for you!
We’re going to discuss the benefits of local WordPress installations, walk you through installing WampServer (WAMP) and how to troubleshoot if things go wrong.
The Benefits of Local WordPress Installation
The main benefit of installing WordPress locally is that you can mess around as much as you like without it affecting visitors, your SEO or live service.
Install WordPress locally and you can:
- Learn WordPress completely free
- Test WordPress, theme and plugin updates before going live
- Speed up development by keeping everything on one device
- Replicate and investigate errors in a controlled environment
There are probably more reasons to use a local install, but those are the main reasons we used them!
WampServer, or WAMP as it’s more commonly known, allows you to install WordPress on your computer.
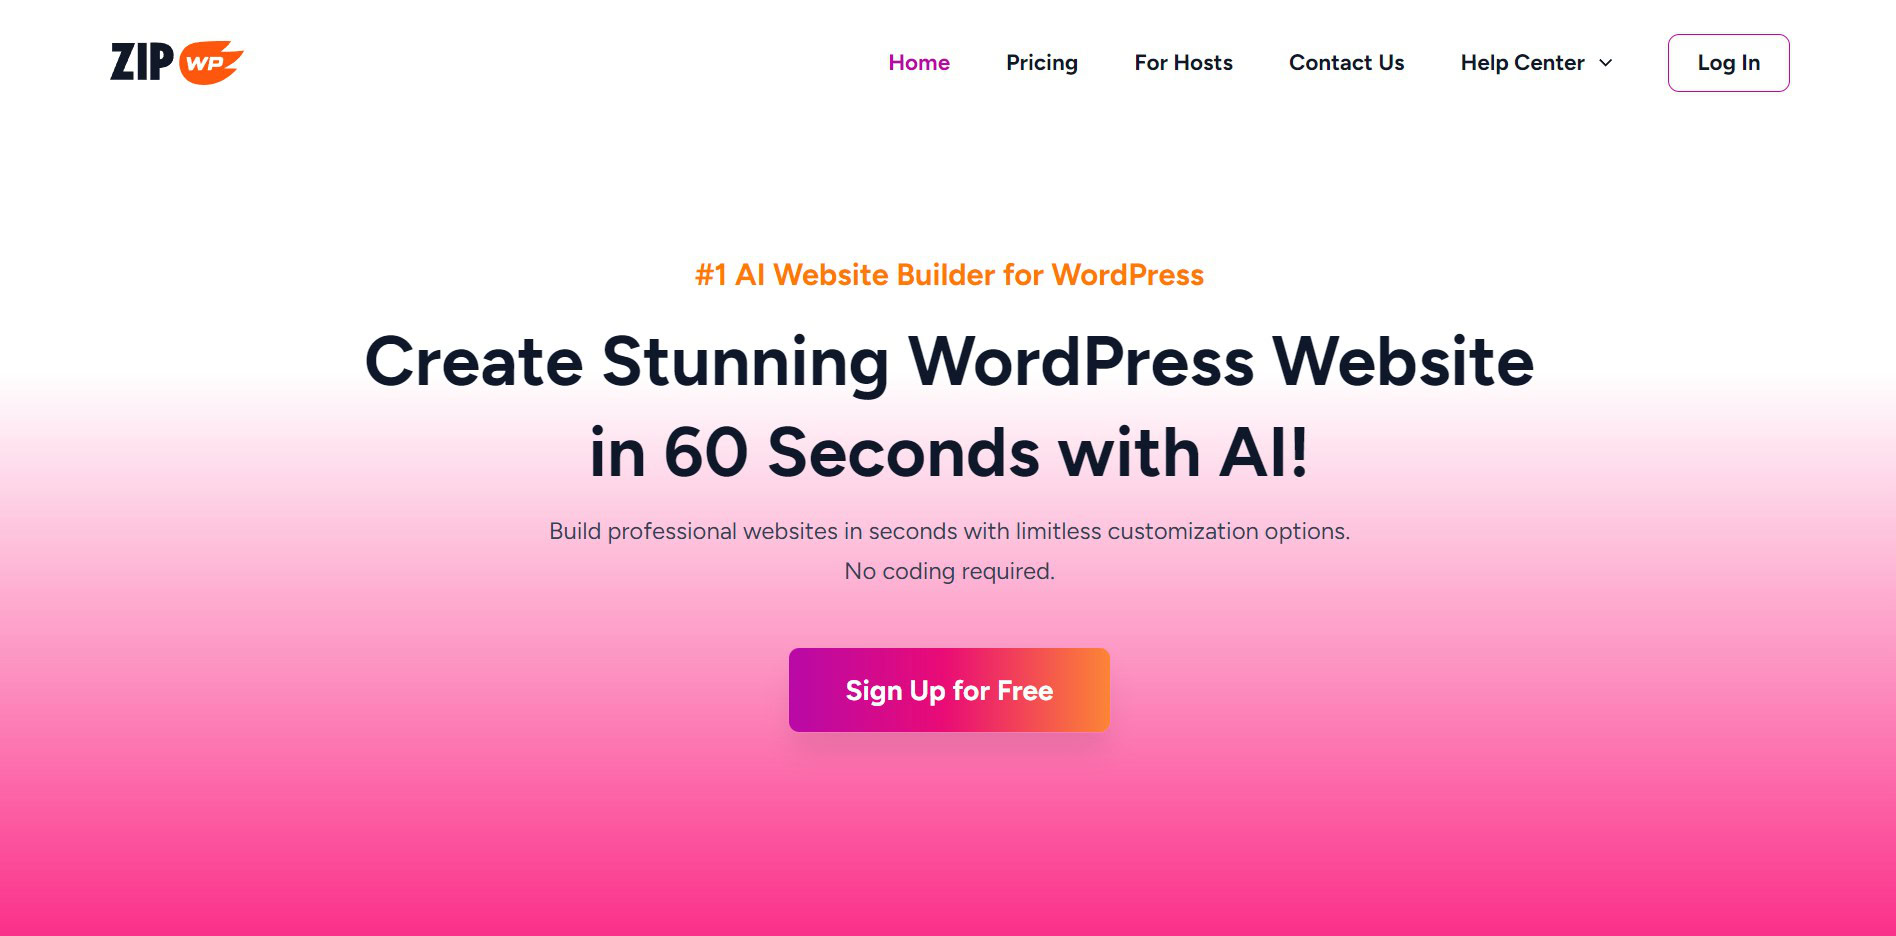
If you don’t want to install a program on your computer, check out ZipWP.
It’s an AI website builder that creates fully working WordPress websites in less than 60 seconds!
Related articles:
- How to install WordPress on a web host
- How To Install the Astra Theme
- Must-Have Plugins For Every Successful WordPress Website
WAMP is relatively easy to set up but there are a few steps involved. Follow them exactly and you’ll be up and running in no time!
Step 1: Download and Install WampServer on Your Computer
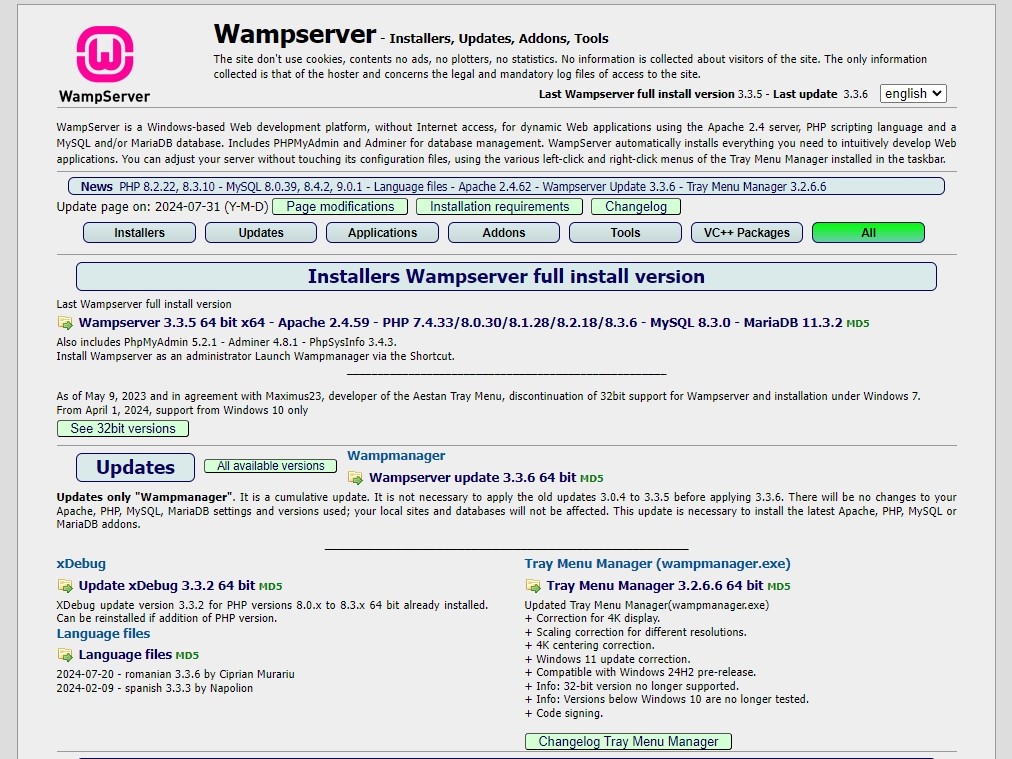
Download WampServer from a trusted source and double click the .EXE file when complete and follow the installation wizard.
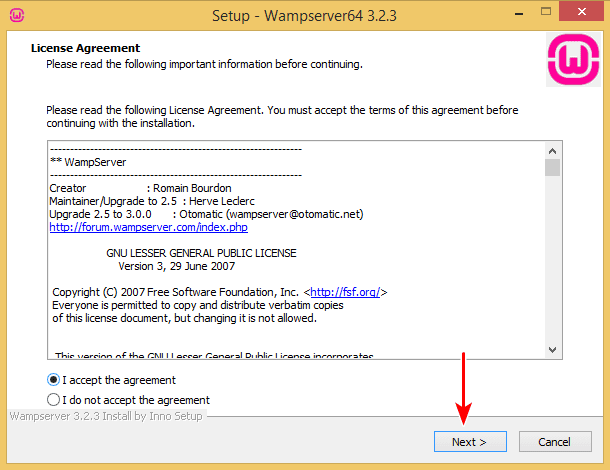
If you see a ‘REDIST error’, download the Microsoft redistributable files mentioned in the error and try again.
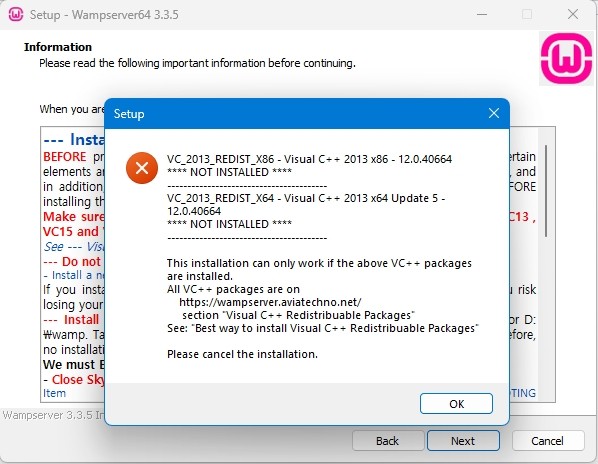
The WampServer homepage has a Visual C++ Redistributable Packages section that contains relevant links to the files.
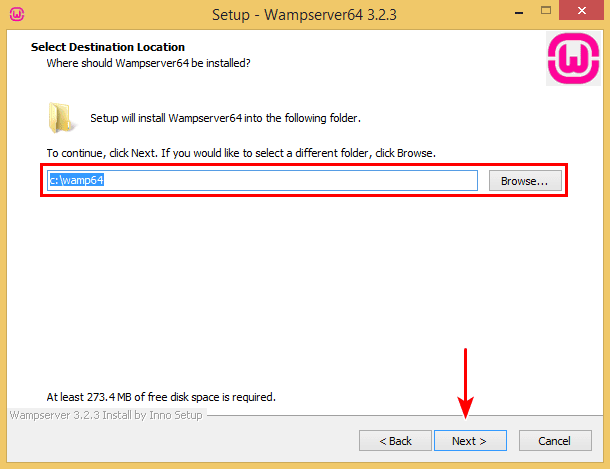
WAMP will be installed in ‘C:\WAMP64’. If you have downloaded the 32 bit version, your folder will be ‘C:\WAMP32’.
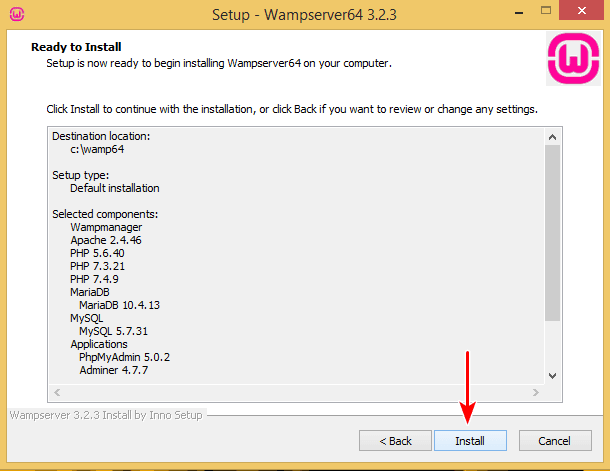
Retain the default values in the window shown above.
If it all looks good, select Install.
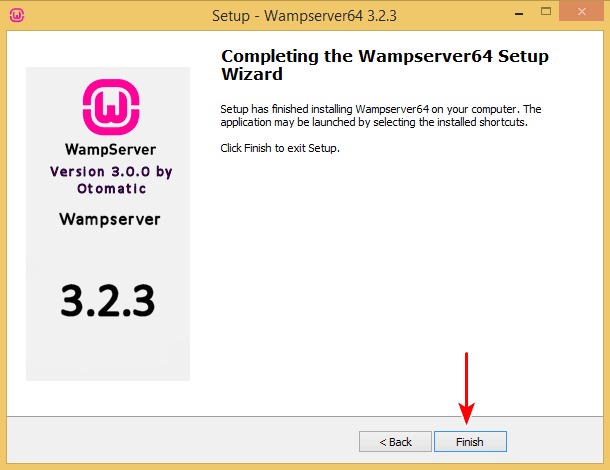
Click Finish when the option appears.
You should now see the WampServer icon in the system tray in the bottom right corner of your desktop.

If the icon is green, your web server is working and ready to go.
If it’s red, it means the server isn’t running and you’ll need to manually start the services.
If the icon is orange, it means the server is partially running but you’ll need to start or restart some services.
Installing WAMP is very straightforward but there are things that can go wrong.
Check towards the end of this post for common issues and their solutions.
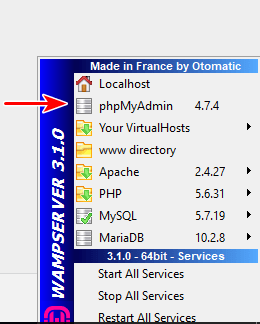
To restart services, click the WampServer icon.
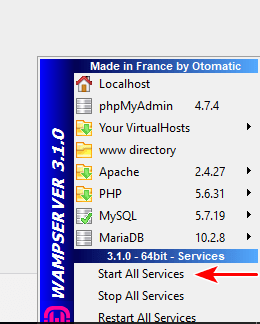
You can Start All Services, Stop All Services, or Restart All Services.
If the icon is red, start them. If it’s orange, restart them.
Once the icon turns green, type ‘http://localhost’ into your browser to test the connection.
You can set WampServer to use HTTPS if you like, but it’s not necessary unless you’re preparing a site for launch.
You should see a window similar to this:
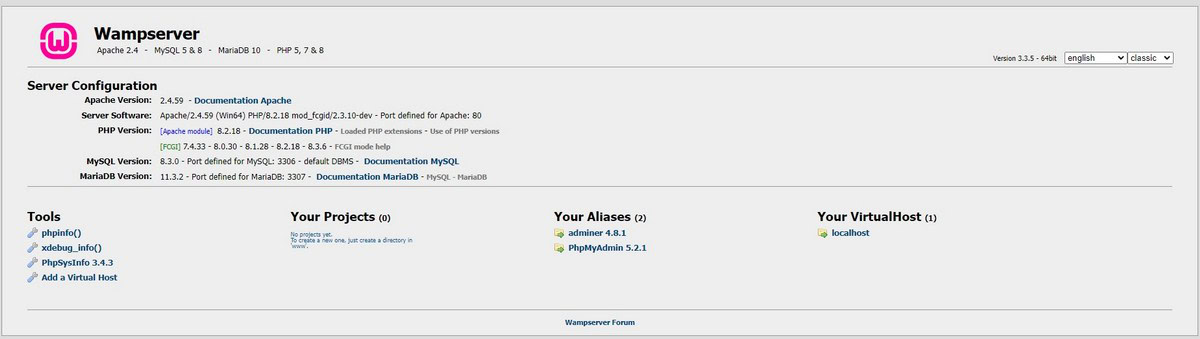
If you see this page, you have successfully installed WampServer on your Windows computer!
The next step is to install WordPress.
Prefer to watch rather than read?
Step 2: Download and Install WordPress
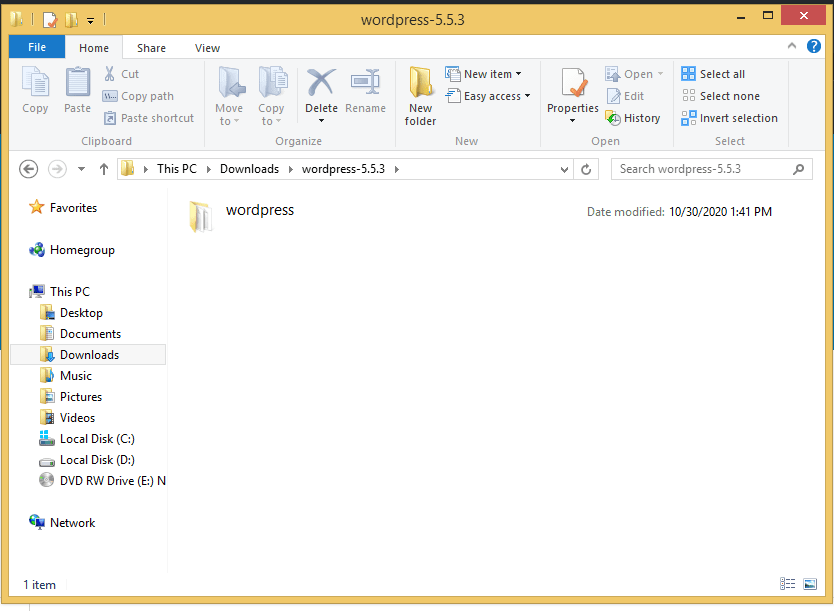
Download the latest version of WordPress from WordPress.org.

You’ll see a zip file in your Downloads folder, extract the contents.
You’ll see a WordPress folder with the version number next to it. Open that until you see a wordpress folder. This contains all the files required to create a WordPress website.
Copy the entire folder and head over to the WampServer folder.
Open the www folder.
Paste the wordpress folder inside www.
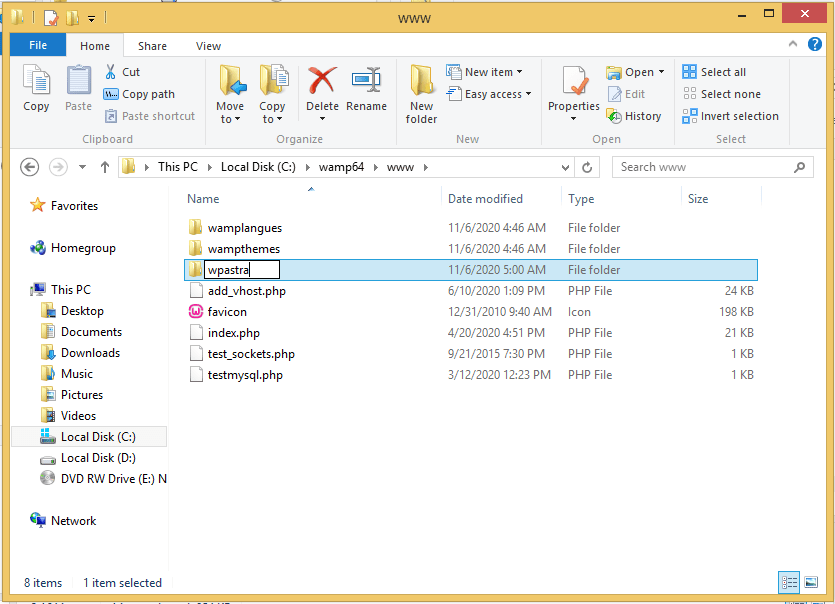
Rename the folder to the name of the website you’re creating.
For this example, we renamed the folder to ‘wpastra’.
This is optional but it’s a quick and easy way to identify the correct folder. This comes in very useful if you plan on working with multiple websites.
When you want to create another site, repeat the above process and rename the folder to something else.
Now, type ‘http://localhost/<wordpress-folder>’ in your browser. Change‘<wordpress-folder>’ to the name of the folder you just copied.
That’s http://localhost/wpastra in our case.
You should see the WordPress setup page.
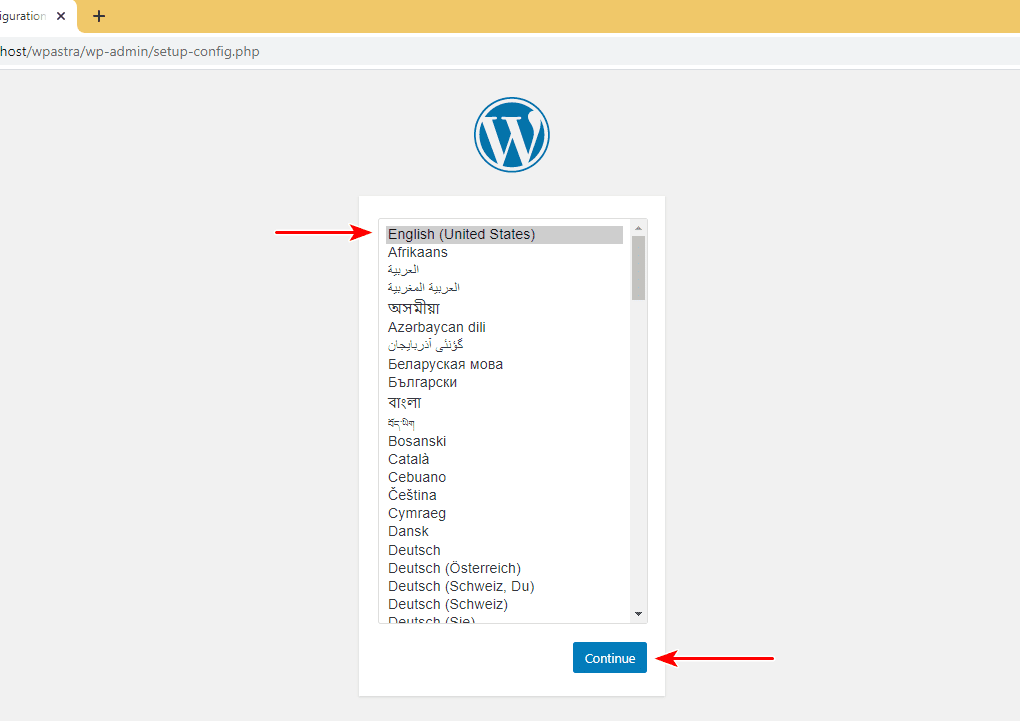
Select your language and click continue.
On the following page you’ll be asked to enter your database details.
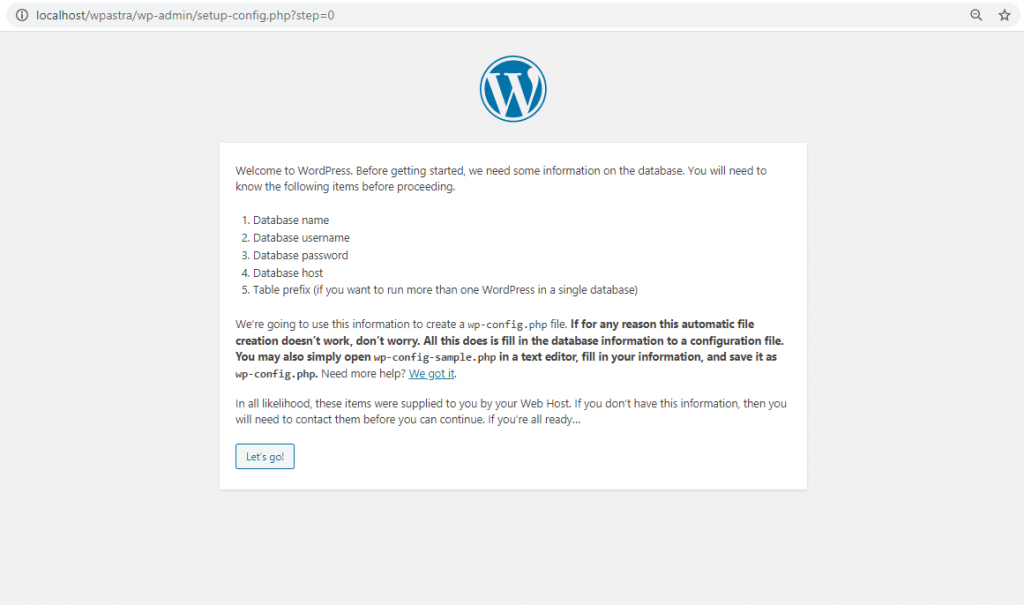
Which brings us nicely onto the final part of the installation process.
Keep the browser tab open for now as you’ll need it in a little while.
Step 3: Create a MySQL Database
As you probably already know, WordPress is database-driven and nothing much happens without one.
Setting up a database is key, which is what we’ll do now.
Click on the WampServer icon on your desktop and you’ll see phpMyAdmin.
Select it and the phpMyAdmin in the slide menu to open a browser window.
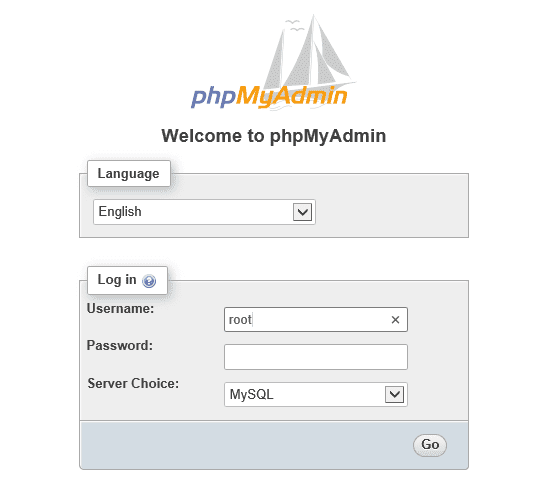
You can also type ‘http://localhost/phpmyadmin’ to arrive at the same place.
Enter root as the username and keep the password blank. Then, click Go.
You will be directed to the phpMyAdmin dashboard.
To create a new database, click the Databases tab at the top.
Enter a Database name where you see Create Database and click Create.

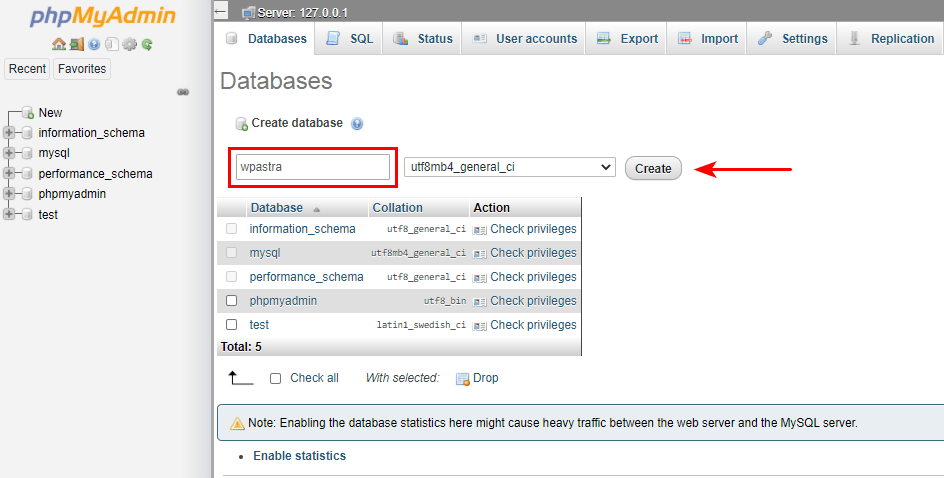
For this example we created a database called ‘wpastra’.
Now the database has been created, head back to the WordPress installation tab we left open earlier and click Let’s go!
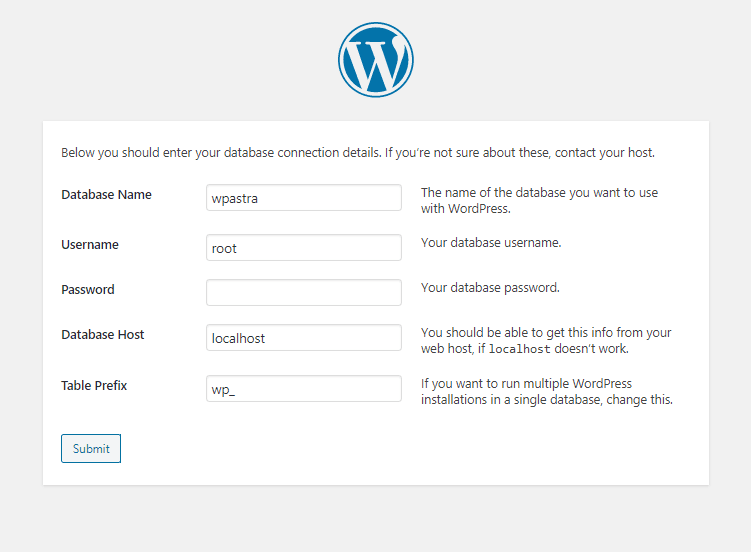
Enter the name of the database you just created under Database Name.
Enter root as your username and leave the password field blank.
Leave Database Host and Table Prefix, as the default values. Click ‘Submit’ when you’re ready.
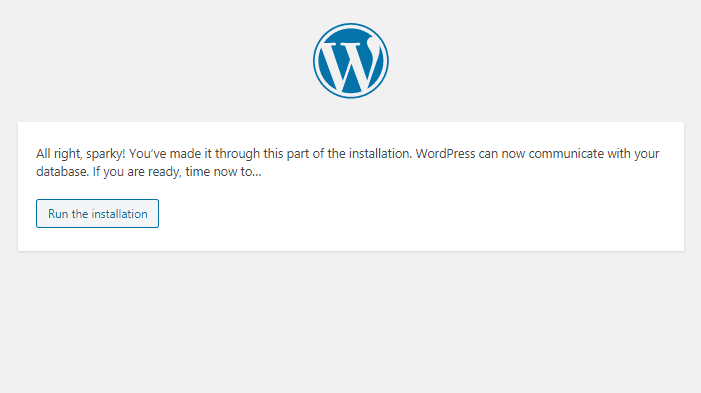
You should now reach the main installation page. Select Run the installation when you’re ready.
Complete the Site Title, Username, Password and Your Email fields.
The username and password should be different to the database as this will be your WordPress login.
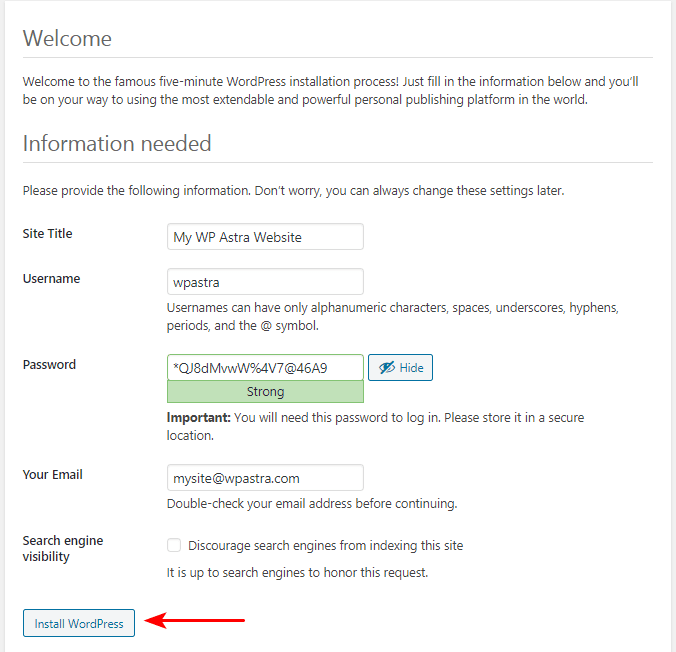
Click Install WordPress when you’re ready.
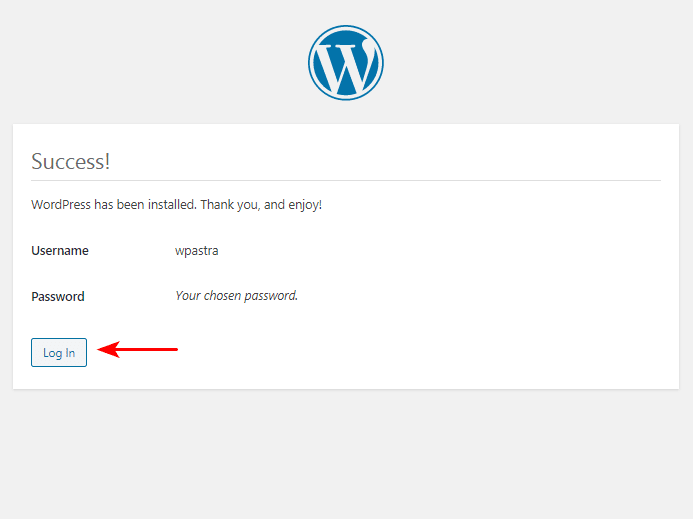
Installation won’t take long and you’ll see a Success! window once complete.
Click Log In using the details you just created once you see the option.
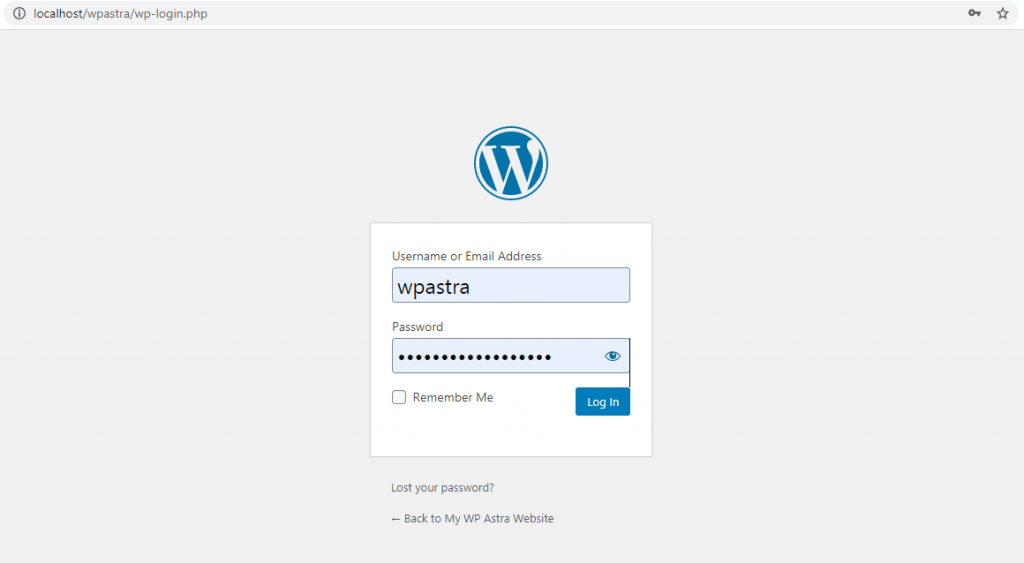
You now should see the WordPress dashboard.
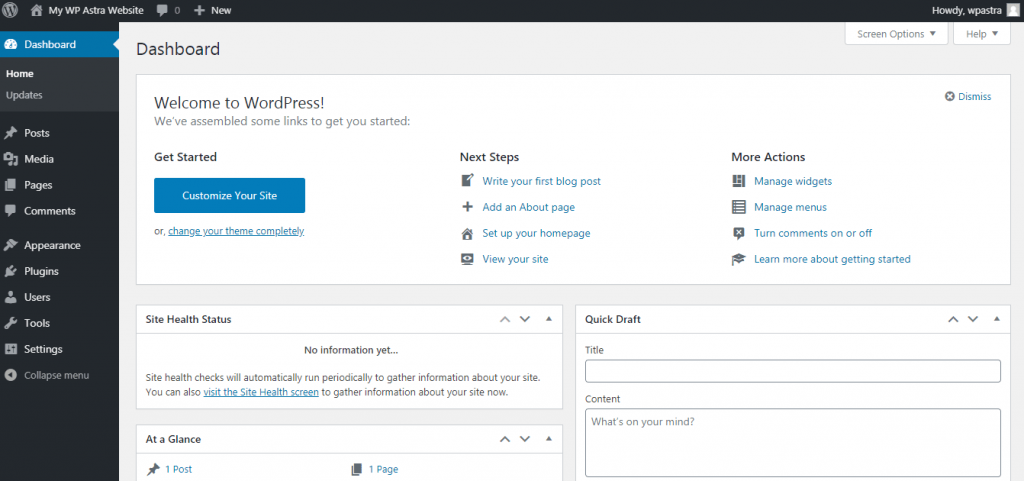
You have successfully installed WordPress on your Windows computer using WampServer, great work!
You can access your website any time using ‘http://localhost/SITENAME.
Just change SITENAME to whatever you called your website.
Now you can install a WordPress theme, plugins and create your website however you like.
Try the Astra WordPress theme for free!
The local installation works the same as a hosted version in most situations except for testing payment gateways and very specific use cases.
Related articles:
Troubleshooting Two Common Issues
We have used WampServer extensively over the years and have seen just about every possible outcome.
There are two common issues you might face:
Missing DLL Files
If you received a missing DLL files message during setup, download them using the following links and try again.
Missing msvcp110.dll or missing msvcp120.dll? Download all missing DLL files from the Visual C++ Redistributable Packages section of the WampServer homepage.
Save them in your C:\Windows\System32\ folder.
Missing Microsoft Visual C++ Redistributable Packages
WampServer also uses Microsoft Visual C++ Redistributable Packages to run and won’t work if any are missing.
We covered this earlier so we won’t go over it again, just visit the Wampserver website and check the Visual C++ Redistributable Packages section.
Working With WordPress
WampServer is very good at what it does, but isn’t the easiest way to build websites.
It used to be the main way we could design, build and test websites before going live, but not any more.
The new best way is to use an AI website builder like ZipWP.
It uses the power of AI to create a first draft website and hosts it for you.
Visitors still won’t see it and your data is secure. It also requires no setup or having to install files on your computer.
Create a free account, set up a website and you can design, tweak and test as much as you like!
Do you use WampServer? Do you use an alternative? Have you tried ZipWP yet? Tell us about it below!
Install WordPress Locally FAQs
Installing WordPress locally on your computer is quite straightforward but you may still have questions.
How do I take my WordPress website online?
The easiest way to take your website online once created with WampServer is to use a migration plugin. It will usually involve creating a backup or duplicate of the site, uploading it to your web host, creating a database and linking the two together. While it may sound complicated, it really isn’t.
Can I install WordPress offline?
Yes, you can install WordPress offline using WampServer. This post outlines the steps you’ll need to take and discusses how to install WordPress locally step by step. You’ll need a copy of WampServer, a copy of WordPress and 20 minutes of your time. That’s it.
How can I update my locally‑installed WordPress, themes, and plugins?
You can update your locally installed WordPress, themes, and plugins in exactly the same way you do live. Log into WordPress, check updates and enable them all. WampServer redirects traffic via localhost but normal web traffic is unaffected so you should be able to update as normal.
What’s the difference between a local WordPress installation and a staging site?
The main difference between a local WordPress installation and a staging site is that local is on your computer and staging is on the web. If you install WordPress locally, you install it on your computer. If you use a staging site, you clone your existing live site on your web host and work on it there.

No Content
Disclosure: This blog may contain affiliate links. If you make a purchase through one of these links, we may receive a small commission. Read disclosure. Rest assured that we only recommend products that we have personally used and believe will add value to our readers. Thanks for your support!


Thank you for the article, but why make things so complicated by installing the not so appealing Wamp when another better faster option is available and is no brainer, I am talking about Local by Flywheel, which is the #1 WordPress Development tool, I personally used it and its installation is a snap and you have to enter the sites you want to work with the user and pass, it installs the latest version of WordPress on the go that’s it. Fire it up and you are ready to go as easy as 1-2-3. A good tool for beginners and wannabe bloggers to test out their gig before going live.
Hello Kurian,
Glad to hear your thoughts. Indeed, the mentioned tools are good alternatives too. 🙂
I personally went with local by Flywheel first but got issues which I failed to resolve. Wamp was a good alteranative which, thanks to this guide, I’ve been able to install successfully.
Hello,
Thank you so much for this awesome article.
You’ve really helped me!
Hi, I need your help please, I follow all the steps in your detailed article, but I’m getting “Error establishing a database connection.”
Any solution to this?
I have installed WAMP and created a WordPress site on my computer; thanks for this excellent guide.
Thank you!!!
Exactly what I needed to develop before making a website live.
Another super helpful and extraordinary article. Thank you for the detailed instructions; it saved my time.
Great guide, hosting wordpress website localy made my developement progress faster.
It is also great way for newbies to learn about wordpress.
Amazing article, any guide on how we can transfer local website to hosting server?
Nice tutorial.
All this time I though it is complicated and avoided. But, it was so easy and get done without any trouble.
Hello Ervin,
Glad to hear that! 🙂
Great, I was able to install everything with ease on my computer. Thanks to you.
Hello Francesco,
Glad to hear that the article helped! 🙂
I want to setup WordPress on local host, just have one question.
Does it allow us to use full functionality of WordPress?
Hello Eliza,
Yes, it would allow making all the changes! 🙂
Which is better WAMP or XAMPP? I’m new in this area, so which is easy to work with?
Hi folks
As a novice, while trying to absorb a lot of knowledge, I stumbled across your editorial in search of how to install WordPress with Wampserver. My congratulations on a well designed process that anyone can follow!
No issues at all as I followed your guidance.
I am definitely going to delve a little more into your resources as I attempt to enter a world of freelance web hosting and development. There is so much to learn but I do believe that I will gain a good deal of knowledge from you.
Thanks once again for your assistance!
W. M.
Hello William,
Glad you found this article helpful! 🙂
The article is excellent. The screenshots and the steps are clearly given.
Great ! Thank you for your assistance.
Hi,
Help me please with the problem: I installed wamp and the latest wordpress in my laptop, created in localhost tour website, and the problem is that when I click on “Tours” on the main menu tab and then on the separate tour it shows this message (Not Found
The requested URL was not found on this server.
Apache/2.4.54 (Win64) PHP/8.0.26 mod_fcgid/2.3.10-dev Server at localhost Port 80)
So, when clicking on the separate tour from the dashboard it goes to the separate tour with a right permalink.
how can I fix it?
by the way when showing error message it doesn’t show the word “wordpress” on the link, but from the dashboard clicking it shows.
Super Easy Explanation! Thanks
Glad you found it useful!
Any solution for the below error, plz???
{
“Cannot select database”
The database server could be connected to (which means your username and password is okay) but the test
database could not be selected.
Are you sure it exists?
*)Does the user root have permission to use the test database?
*)On some systems the name of your database is prefixed with your username, so it would be like
*)username_test. Could that be the problem?
}
As per the error shared, it seems your database credentials do not match. You would require to review them if they are same as you are entering to connect the site.
I got this issue and it was solved by going to PHPMyAdmin and creating the DB according to this guide